Acorn Controller Upgrade
The machine came to me with a Centroid Acorn Controller installed. I finished the installation by adding the wiring and other aspects to make the turret run under CNC control. You can see the Turret Adventures here.
Part of the upgrade revolved around an issue with having the Clear Path servo motors in series for the motor fault circuit. The other part of the upgrade was to install a board that made the spindle control much easier.
The two boards in question are: C86ACCP Clear Path Acorn Connector Board and the C89 +/- 10VDC Analog Speed Control board, both available from CNC4PC.
In the process of planning the integration of these two boards I elected to start from scratch with the wiring of the system, eliminating the individual relays and oddball power supplies scattered around the cabinet and make better use of the allotted space.
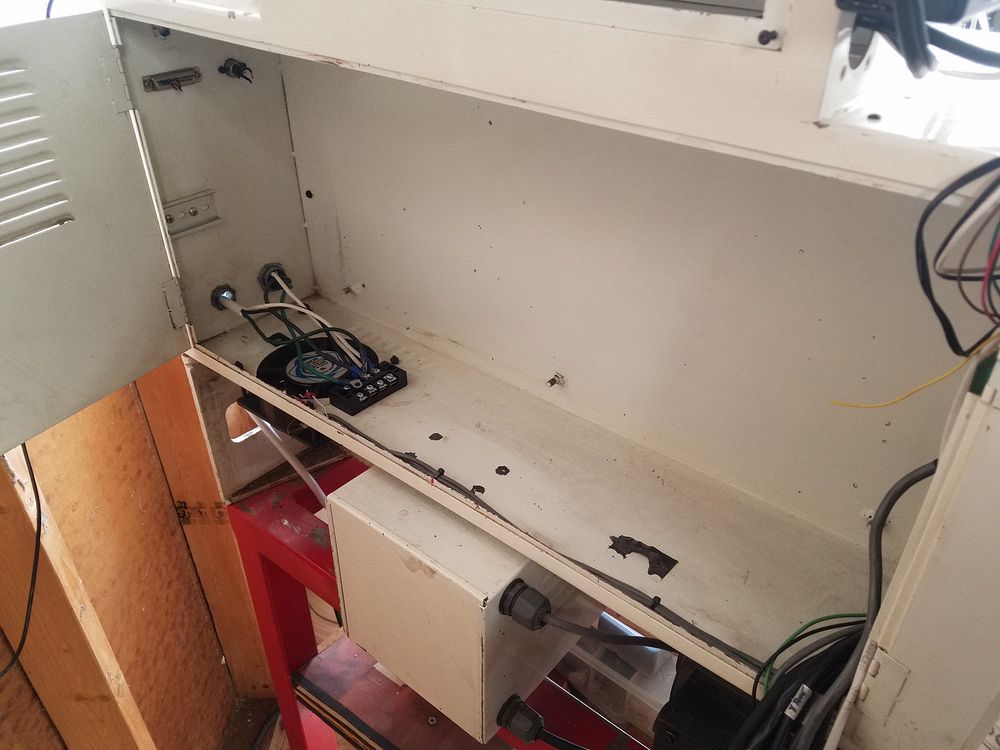
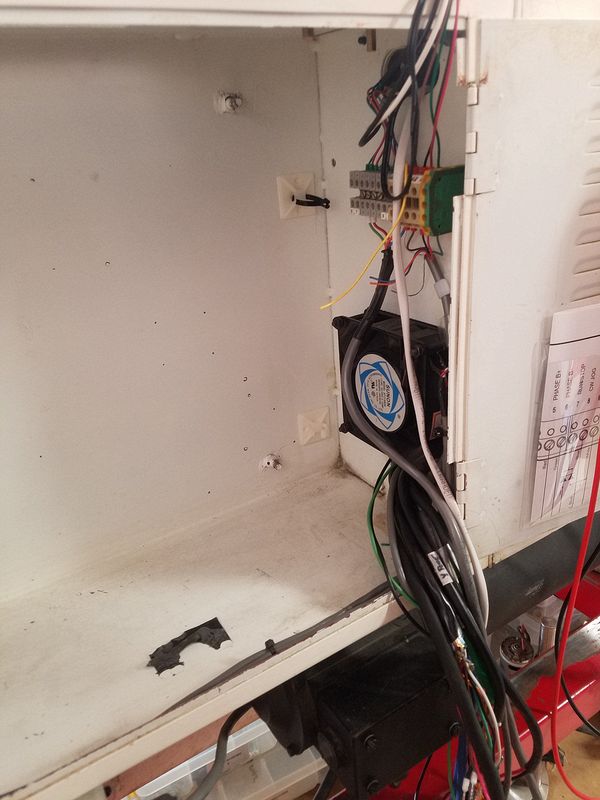
I removed the existing plate and controls, documenting cables in the cabinet as I went.
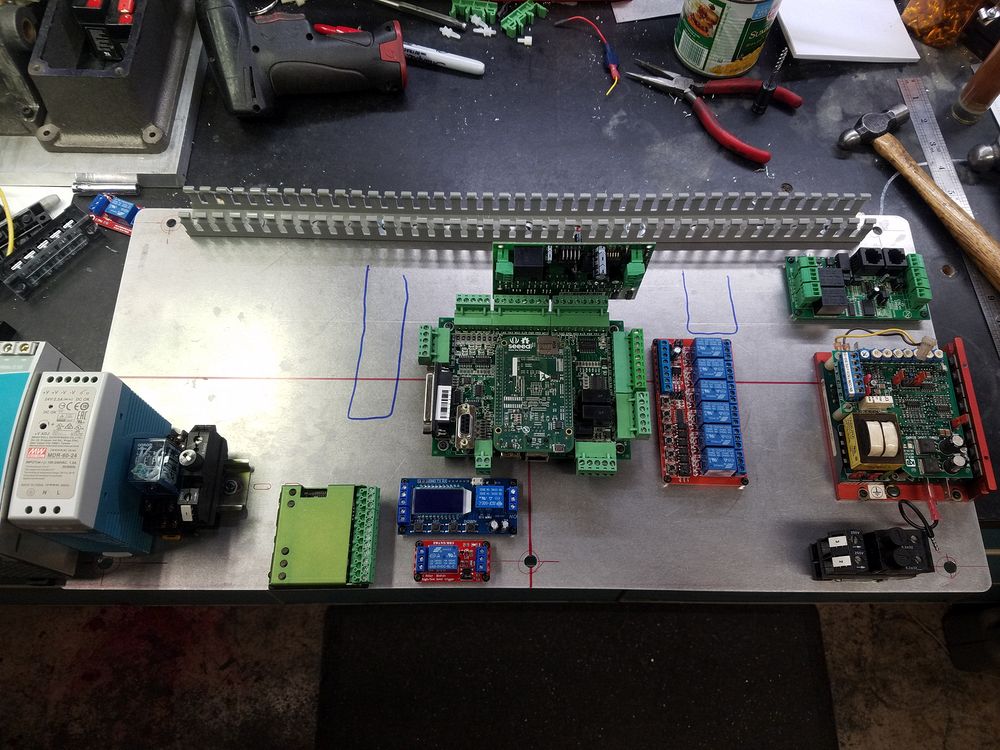
A fresh aluminum plate 11.25 X 25" was cut and drilled to match the mounting studs in the cabinet. The main components were laid out on the plate according to a TurboCad drawing I spent an evening or two playing with. Ultimately the layout changed only a little bit and a few components were changed. In the end the layout held true to the plans. A raceway was placed across the top of the panel with drops (magic marker) planned to come down on the Left and Right sides of the Acorn.
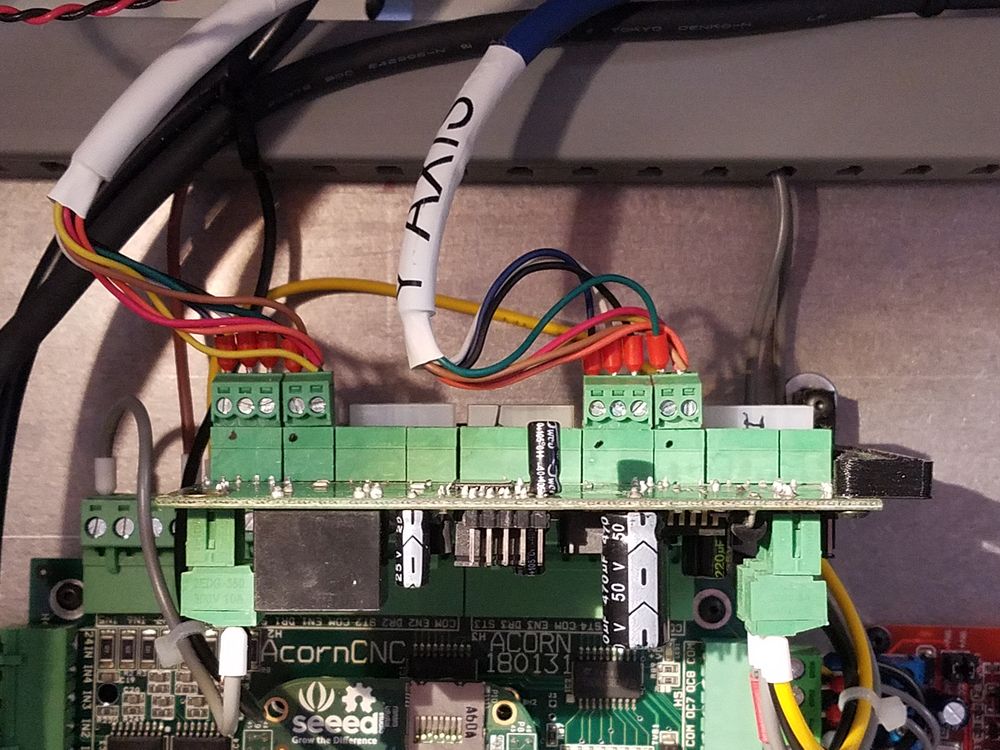
Center Acorn controller with C86ACCP board mounted
Center 6 channel relay board (the earlier Acorn I am using does not have the dedicated relay board
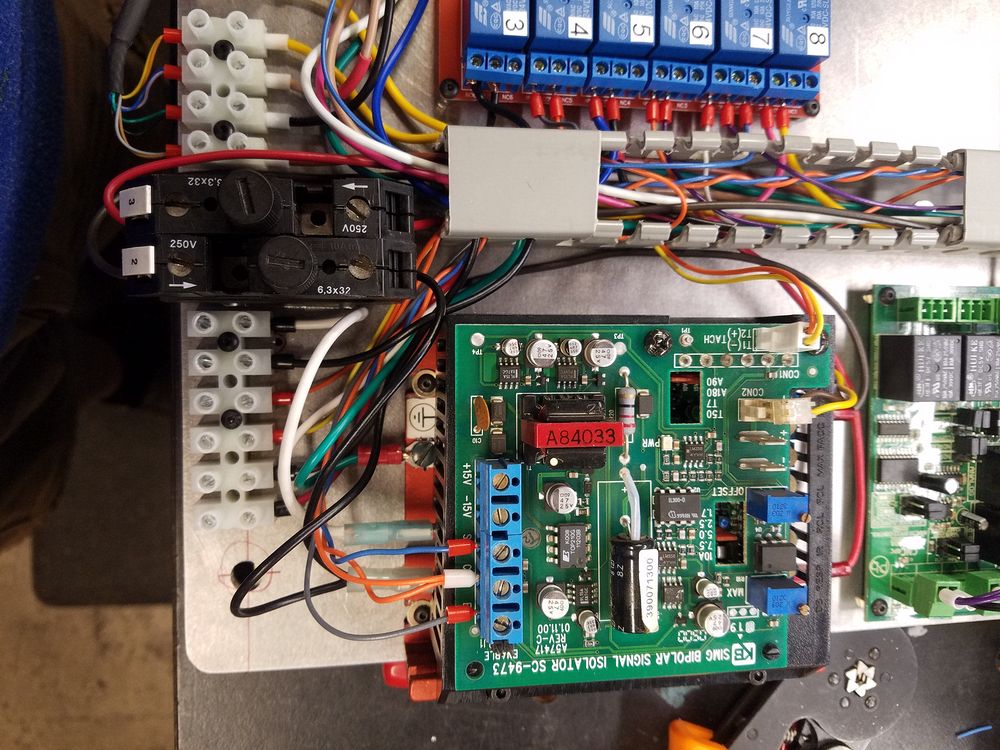
Right Upper C89 +/- 10VDC Analog Speed Control Board
Right Middle KBMG 212 Spindle Drive Controller
Right Lower Fuse holders for Spindle Drive
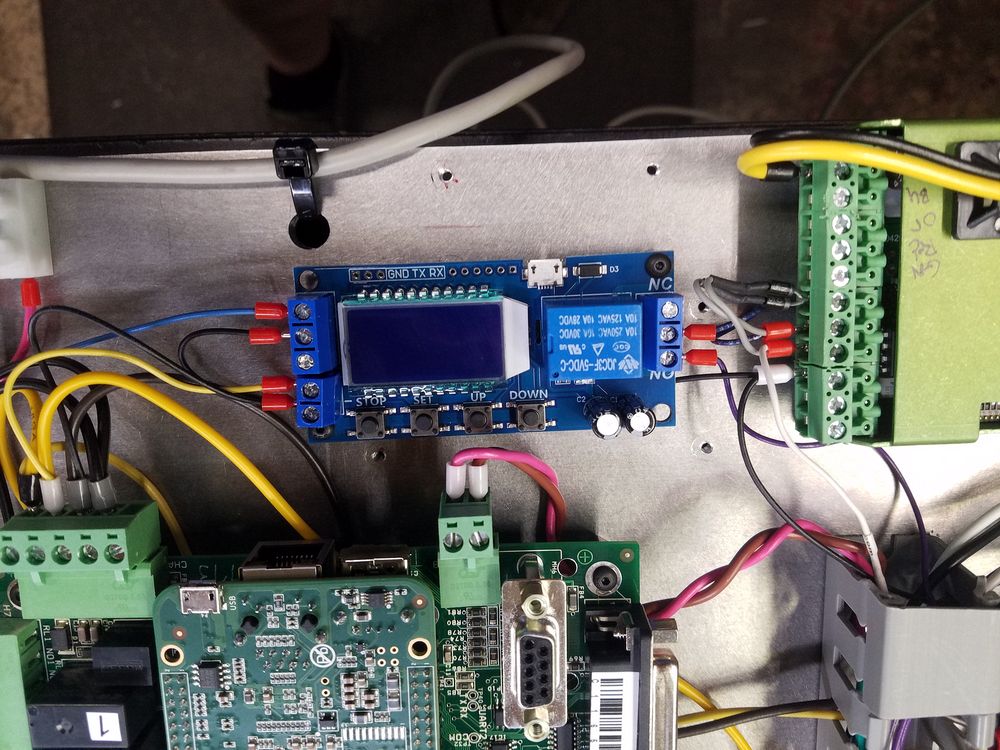
Center Bottom Time Delay Reversing relay for the Turret with original relay below. This additional relay function was moved to the 6CH relay board
Center Bottom Gecko Stepper motor controller
Left Lower Power supplies, relay and Main Fuse holder

My Acorn was an early enough version that it did not have the dedicated relay board. I sourced a 6 channel 24V board to compliment the two relays already on the Acorn. The Clear Path adapter board was just asking for a brace, so I designed and 3D printed a simple brace (center image).
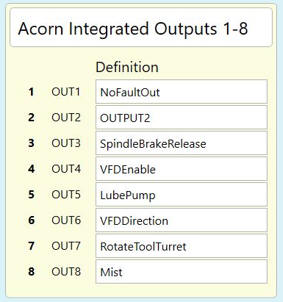
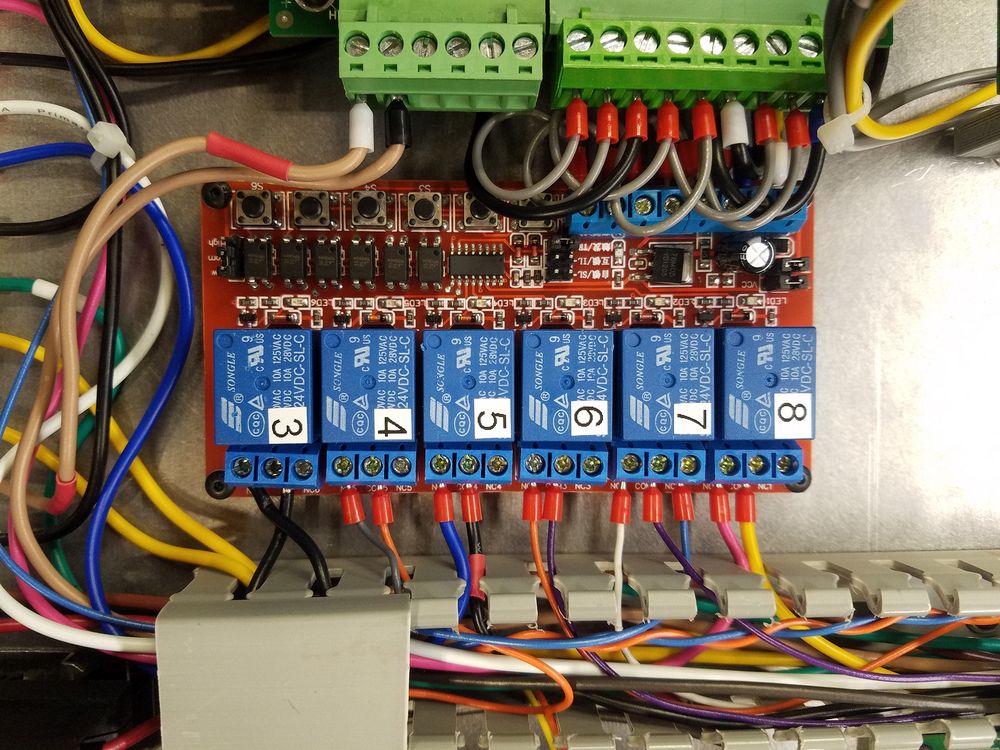
Final layout of the relays The outputs in Acorn match the relay numbers in the machine for clarity.

On the left is the 10V +/- Analog Speed control board which takes the analog 0-10V drive from the Acorn and allows the motor controller (KBMG 212) to have 0-10V+ and 0-10V- input to allow for reversing the motor. The Acorn has no provision for +/- output. On the right is the Gecko stepper driver for the turret motor along with the reversing relay that is described in detail here...
The turret is commanded to move forward just past the desired tool and then the delay relay back the turret up against the stop. The module is programmed to run the turret in reverse for about a second.

Completed panel installed in the cabinet, ready to start hooking wires to the peripherals! Power supplies are (L to R) Turret Stepper 24V, Lighting 12V, Acorn Controller 24V and Logic Power 5V. The left most power supply has not been fastened down yet due to bolt access behind it being required. Power supply for the Clear Path servos is in the metal box immediately below the cabinet.
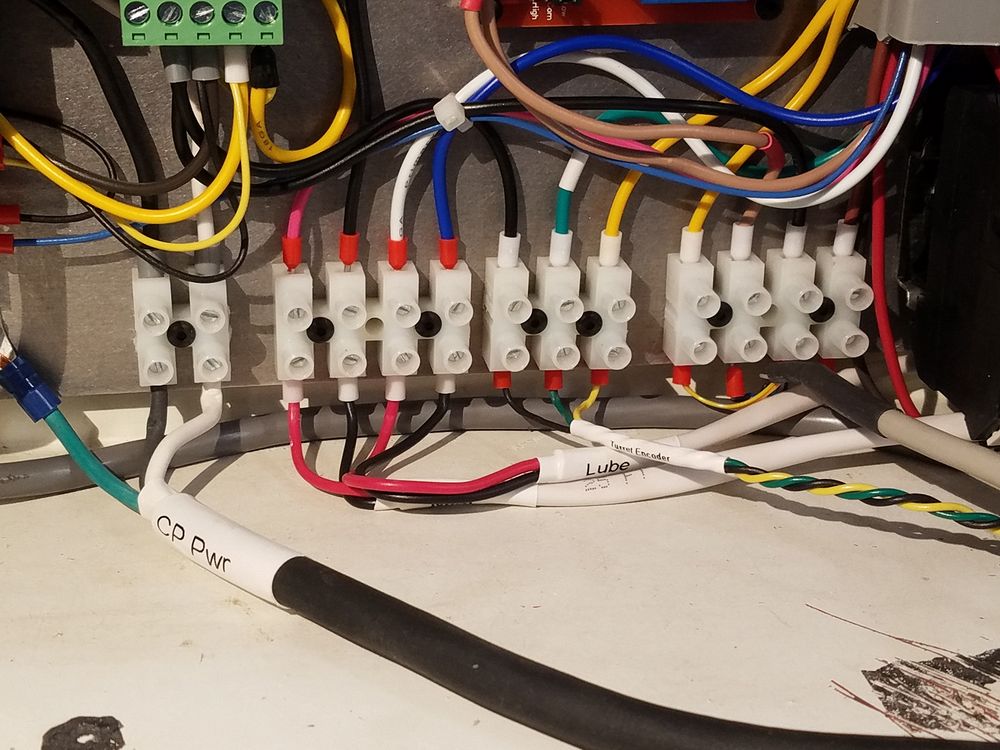
A series of European terminal blocks was placed across the bottom to make the connections for the Limit Switches, Spindle Motor, Lube & Mist feeds, E Stop Switch and other items. The top of the panel only has the cables from the Clear Path servo motors which connect to the CP86ACCP interface card. Tubular labels made with a Rhino industrial labeller were used on a number of the heavier cables. All off board connections are at the bottom with the exception of the mains power which are confined to the upper left of the panel above the power supplies. In a pinch the panel could be removed with little effort. Ignore the Clear Path data cable on the right that is plugged into the wrong header socket....

I use a program called sPlan by Saelig to draw my wiring diagrams. Here is the final diagram, no real changes needed to be made from what I planned in comparison to the running version of the machine. A testament to careful planning prior to construction. The neat thing about this diagramming software is images can be inserted into the plan.